Concrete floors often look solid at a glance, yet small flaws hide beneath the surface. People tend to expect coatings to fix those issues on their own, creating a quiet gap between expectation and outcome. Concrete coating prep closes that gap, offering a path toward floors that perform the way they should.
Why Floor Prep Matters (The 80% Rule)
Concrete seems unchanging, yet its surface shifts from wear, moisture, and hidden residues. Many assume a strong coating will cover those irregularities, though the bond relies on events that occur long before pigments or resins come into contact with the slab. The 80 percent rule reflects that reality. Most coating failures trace back to overlooked preparation rather than product strength. Careful attention to the early stages creates conditions in which systems like Nohr-S® Polyurea, HellFire®, or epoxy coatings can anchor to the concrete rather than sit on top of it. This early work creates durability, consistency, and a surface ready for long-term performance.
How to Prep Your Concrete Floor for Coating: A Step-by-Step Guide
Concrete preparation becomes much easier when the work follows a steady, predictable rhythm. Each stage supports the next, creating a surface that responds well to coatings instead of resisting them. The sequence below breaks the process into manageable steps, providing structure to an otherwise layered task.
Step 1: Inspect & Assess the Slab
A concrete floor often carries a long memory. Old stains, minor cracks, and areas worn smooth tell the story of what it has supported over time. Taking a slow walk across the surface helps reveal those details. Look for changes in texture, discoloration, or spots that sound hollow when tapped lightly. These early observations create a baseline for the work ahead and help determine what repairs or cleaning methods will be needed before any coating touches the floor.
Step 2: Remove Stains, Grease, and Contaminants
Once the floor’s condition becomes clear, attention shifts to removing anything that might interfere with adhesion. Oils, grease, road residue, and embedded grime can linger deep within the slabs’ pores. A concentrated cleaner such as HypoLuxo™ Cleaner/Degreaser helps break those bonds and lift residue from the concrete. Scrubbing and rinsing reveal the true condition of the surface, creating a cleaner starting point for the next phase. Ignoring this early work often results in coatings that separate long before their expected lifespan.
Step 3: Mechanical Surface Prep (Critical Step)
Mechanical profiling shapes the surface, so coatings can anchor rather than rest on top. This stage removes weak material, opens the concretes’ pores, and creates a uniform texture that supports long-term performance for systems like Nohr-S® Polyurea, HellFire®, and epoxy coatings. The goal is a consistent surface profile that sets the stage for the remaining steps for success.
Recommended Tools for Mechanical Prep
Mechanical work relies on equipment that matches the slab’s condition. Some tools reshape the surface, others refresh lighter wear patterns, and each supports different levels of preparation. A few common options include:
- EDCO 10″ Diamond Grinder paired with a HEPA dust-vac for dependable profiling
- 30-grit medium-bond diamond tooling for cutting through laitance and residues
- Shot blasters for large spaces needing a uniform texture
- Scarifiers or planers for removing heavy buildup or thick, failing coatings
- Planetary grinders for fast removal over wide areas
Selecting the right tool creates a surface that supports long-term adhesion for systems like Nohr-S® Polyurea, HellFire®, and epoxy coatings.
Diamond Grinding (Most Common Method)
Diamond grinding offers steady control over the surface and works well in garages, workshops, and commercial spaces. An EDCO 10″ Diamond Grinder paired with a HEPA dust-vac creates a clean, even profile across the slab. Fitting the grinder with 30-grit medium-bond diamond tooling lets it cut through laitance and old residue. The surface often turns a lighter, chalky tone once the weak material is removed, signaling that the grinder has reached solid concrete.
Shot Blasting (Best for Large / Industrial Slabs)
Shot blasting suits wide, open floors where uniform texture matters. The machine propels small steel shot against the surface, producing a consistent profile across large areas in far less time than grinding. Industrial spaces, warehouses, and high-traffic facilities benefit from this method. It creates a dependable texture for high-performance coatings even in challenging environments.
Additional Mechanical Prep Options
Some conditions call for tools outside the traditional grinder-and-vac setup. These alternatives can help adapt to floor constraints, access limits, or specific surface challenges:
- Diamabrush heads for light resurfacing when heavy removal isn’t required
- Scarifiers for deep removal or textured finishes, followed by grinding to smooth out grooves
- Planers to eliminate thick layers of old material
- Large planetary grinders for rapid coverage in commercial spaces
Each option contributes its own strengths, though most situations still benefit from the control and consistency of a diamond grinder.
Acid Etching (Alternative When Grinding Is Not Possible)
Some floors are located where grinders or blasters cannot be used, leaving acid etching as the remaining preparation method for bare concrete. HD357 Concrete Etch offers a controlled reaction that avoids the harsher qualities of muriatic acid. The slab should be damp before application, and the solution needs to be spread evenly using a plastic sprinkling container. Bubbling indicates a reaction occurring at the surface.
Areas that do not respond often hold residue and may need a second cleaning or mechanical attention. Scrubbing helps expose fresh cement paste and encourages a more consistent texture.
After rinsing multiple times to fully remove the etch solution, let the slab dry completely. The concrete should feel similar to medium-grit sandpaper before proceeding with repairs or additional preparation steps.
Step 4: Repair Cracks, Joints & Damaged Areas
Concrete typically reveals its history once the surface has been cleaned and profiled. Small fractures, open joints, and worn sections indicate where movement or wear has taken place. Addressing these issues early ensures the coating forms an uninterrupted surface. A fast-setting material such as XtremeSet 100 Crack & Joint Filler works well for cracks and control joints, creating a stable base that blends smoothly into the surrounding slab once cured and ground flush.
Patching Spalls, Pitting, and Rough Areas
Some areas carry more serious damage that goes beyond a simple fill. Spalls, divots, and worn pockets require a sturdier repair to rebuild the concrete’s structure. FiveTon® Concrete Patch can restore those sections and provide a surface that matches the surrounding floor. After the patch cures, a brief pass with a grinder levels the transition and prepares the repaired area for coating.
What to Do With Control Joints
Control joints help concrete manage natural movement, and decisions around filling them depend on how the space will be used. Many garage floors leave them open, while seamless systems often call for filling to create a uniform appearance. XtremeSet 100 offers enough stability for either approach and bonds tightly within the joint profile. Once treated and smoothed, the joints blend into the larger preparation work and set the stage for the coating phase.
Step 5: Thorough Vacuuming & Dust Removal
Surface preparation leaves behind a fine layer of concrete dust that can interfere with the bonds of a coating. A HEPA-rated vacuum removes this residue far more effectively than a standard shop vacuum. Edges, corners, and repaired areas typically hold the most leftover material, so they benefit from slower, deliberate passes. A clean surface at this stage helps the next steps proceed more smoothly.
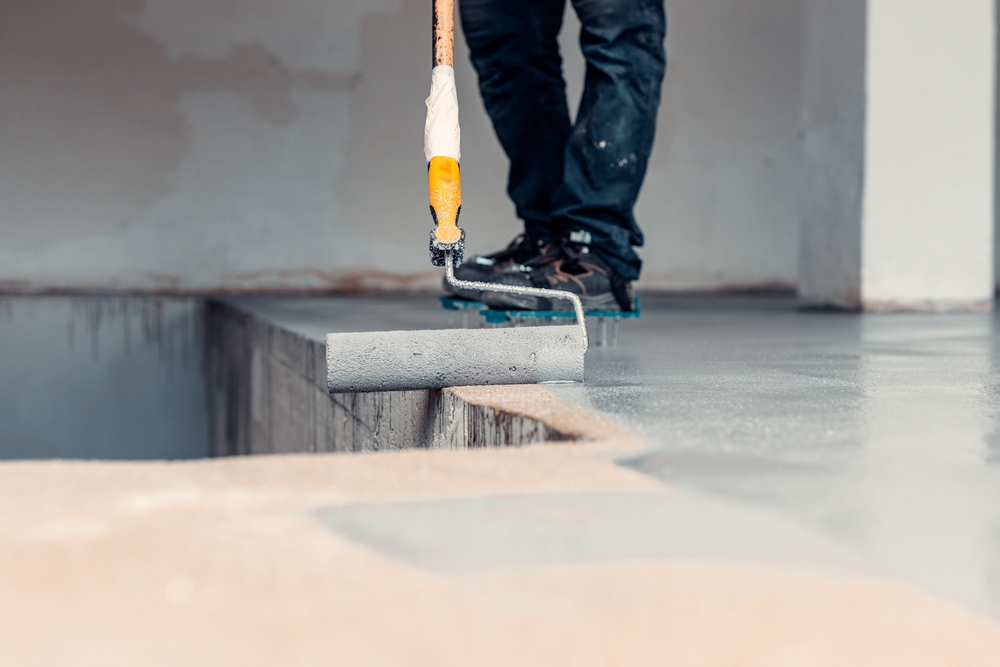
Step 6: Moisture Testing (Critical for All Coatings)
Concrete holds moisture in ways that are not always visible. Even a floor that appears dry can release vapor that disrupts curing, leading to discoloration or premature separation. Simple tests with plastic sheeting offer a first look, while calcium chloride kits or RH probes provide clearer readings. This early check becomes a safeguard against problems that only appear after coating installation.
Step 7: Final Pre-Coating Checklist
The last stage brings together everything completed so far. The surface should feel uniform, repairs should sit level, and the floor should look free of dust or residue. Environmental conditions such as temperature and humidity matter during this phase, as each coating system responds differently. Once the slab meets these conditions, it is ready for the application of systems like Nohr-S® Polyurea, HellFire®, or epoxy coatings.
Product-Specific Notes from Legacy Industrial Instruction Sets
Each coating system follows the same preparation principles, yet its formulations benefit from slight adjustments in technique. These details help the materials settle into the concrete more effectively and support the performance characteristics for which they were designed. The notes below reflect the most consistent patterns seen across successful installations.

For Nohr-S Polyurea Kits
Nohr-S Polyurea performs best on a surface that has been shaped through steady mechanical profiling. A thin first coat helps it sink into the concrete’s open pores, creating a strong foundation for the remaining layers. Dry, clean conditions help the material settle without interruption, especially in spaces where temperature shifts are common.
For Aegis Kit
Aegis builds strength through penetration, so surface cleanliness and dryness play a bigger role in how the material bonds. A light, even application of the first coat helps the resin move into the pores created during profiling. Consistent environmental conditions allow the coating to cure at a steady rate, preventing surface irregularities.
For Nohr-S Full Flake System
Full-flake floors need slightly more texture from the preparation phase. A profile on the higher end of the recommended range helps the color coat grip the concrete before flakes are broadcast upward. Once the flakes reach full refusal, scraping and top coating smooth the surface. Repairs made earlier using XtremeSet 100 blend into the background once the system is complete.
For BarnStormer Coating Kit
BarnStormer relies on preparation that removes weak material and exposes a dependable layer of concrete. Older slabs or floors that have been exposed to long-term wear often benefit from additional grinding passes before installation. Once the surface shows an even profile and the earlier repairs are fully cured, the coating settles across the slab in a uniform layer, highlighting the preparation underneath.
Common Prep Mistakes to Avoid
Concrete preparation involves many small steps, and a few recurring issues appear across different projects. Some come from moving too quickly, while others stem from skipping early evaluations. The points below outline the common problems encountered during installations.
- Cleaning that leaves behind oils, grease, or residue, which can disrupt how a coating bonds
- Surface profiling that stops too early and leaves glossy patches or weak material in place
- Dust remaining after grinding, especially along edges or repaired areas
- Moisture that rises through the slab affects color, curing, or adhesion
- Repairs that are rushed before they fully cure or blend into the surrounding concrete
Ready to Start? Explore Our Coating Products, Resources, and Expert Support
Concrete projects often feel more manageable once the surface is prepared and the path forward becomes clearer. The materials selected for cleaning, repair, profiling, and coating work together to shape the floor’s long-term performance. Legacy Industrial offers options that fit each stage, from HypoLuxo for initial cleaning to XtremeSet 100 and FiveTon for structural repairs. Systems such as Nohr-S Polyurea, HellFire, and our epoxy coatings provide the finishing layer that brings the effort together.
Questions about product selection or project conditions often come up. Contact the Legacy Industrial team for help choosing the right system, confirming your prep approach, and matching products to your concrete.